Introduction#
The time has finally come! Ghostty Terminal was officially released as version 1.0.0 at the end of December. I’ve been eagerly waiting for this fast, GPU-accelerated terminal emulator to land in my hands.
Ghostty is a terminal emulator written in Zig, designed with these goals in mind:
- Native support for Linux and macOS (Windows support coming soon)
- Fast performance (comparable to Alacritty)
- Feature-rich: e.g., Kitty Graphics Protocol, light/dark mode notifications, hyperlinks, and more
Here’s how it compares to other terminals:
| Feature/Metric | Ghostty | iTerm2 | Alacritty | Kitty |
|---|---|---|---|---|
| GPU Acceleration | Yes | No | Yes | Yes |
| Native Tabs/Splits | Yes | Yes | No | Yes |
| Theme Customization | Extensive | Limited | Limited | Extensive |
| Protocol Support | Modern & Rich | Standard | Standard | Advanced |
| Performance (FPS) | 480-500 | <10 | ~500 | ~500 |
| Text Rendering Speed | 73ms | 470ms | 66ms | 103ms |
Ghostty is open-source with no commercial backing—a hobby project by Mitchell Hashimoto.
Let’s explore its features and dive into my current configuration.
Features of Ghostty#
Native Functionality#
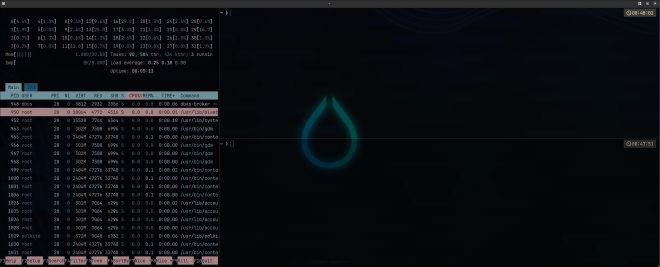
Ghostty behaves as a native application in your desktop environment. With Ghostty, you can create tabs, splits, and panels directly in your terminal—no external multiplexer needed.
This feature might even tempt me to ditch tools like Tmux or Zellij and rely solely on my terminal.
Fast Performance#
As a Neovim user, I often encounter scroll lag when opening large files. Performance is crucial. Based on official benchmarks, Ghostty performs on par with Alacritty. Therefore, I’m confident it will handle my workflow efficiently.
Rich Feature Set#
Beyond graphics protocol support, Ghostty includes:
- Hyperlinks: Click URLs directly in terminal output
- Notifications: Desktop alerts for long-running commands
- Developer API: Programmatic control via CLI or extensions
The full feature list is in the official docs, but these are the ones I actually use.
My Configuration of Ghostty#
Once installed, I quickly realized how much effort Mitchell put into ensuring Ghostty is a plug-and-play terminal. It works flawlessly with zero configuration. However, if you want to customize it further, you have to:
- Create a configuration file at
$XDG_CONFIG_HOME/ghostty/config(defaults to~/.config/ghostty/config). - Customize settings to your preferences. Here’s my detailed configuration:
font-family = JetBrainsMono Nerd Font
font-size = 20
theme = rose-pine
cursor-style = block
adjust-cell-height = 35%
background = #000000
background-opacity = 0.65
window-padding-balance = true
copy-on-select = clipboard

# Keybindings
keybind = alt+s>r=reload_config
keybind = alt+s>x=close_surface
keybind = alt+s>n=new_window

# Tabs
keybind = alt+s>c=new_tab
keybind = alt+s>shift+l=next_tab
keybind = alt+s>shift+h=previous_tab
keybind = alt+s>comma=move_tab:-1
keybind = alt+s>period=move_tab:1

# Quick Tab Switch
keybind = alt+s>1=goto_tab:1
keybind = alt+s>2=goto_tab:2
keybind = alt+s>3=goto_tab:3
# Splits
keybind = alt+s>ctrl+v=new_split:right
keybind = alt+s>ctrl+h=new_split:down
keybind = alt+s>z=toggle_split_zoom
Font Family and Theme#
To start customizing Ghostty, you can use the CLI tool to modify themes, fonts, and other settings in your current session or list available fonts, themes and keybindings.
Themes#
Ghostty supports all ITerm2 themes. To see the list of available themes, use:
ghostty +list-themes
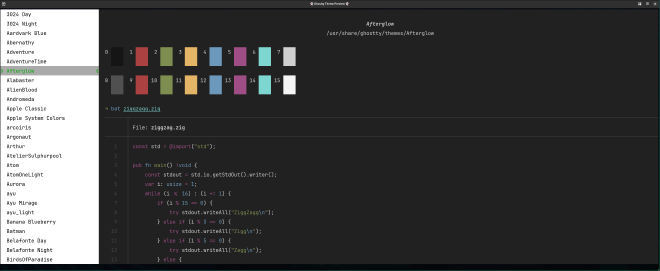
ghostty +list-themesI chose the rose-pine theme, but you can further customize the theme by defining separate options for light and dark modes.
Use the following commands to configure this directly in the Ghostty configuration file:
theme = light:rose-pine-dawn,dark:rose-pine
I also customized the background and opacity to match my look and feel preferences:
background = #000000
background-opacity = 0.65
Custom themes go in one of two locations:
$XDG_CONFIG_HOME/ghostty/themes$PREFIX/share/ghostty/themes
Fonts#
To list available fonts, use:
ghostty +list-fonts
I ended up with:
font-family = JetBrainsMono Nerd Font
font-size = 20
Keymaps#
The killer feature for me is the ability to adapt keymaps to my preferences. Ghostty uses this pattern:
keybind = trigger=action
The trigger is your magic keymap that initiates the action. In my case, the trigger is alt+s, which acts as the Ghostty “magic key.” By combining it with > and a custom key, you can define specific actions. For example, alt+s>r means alt+s activates the Ghostty magic key, and pressing r executes the specific command—in this case, reloading the configuration.
The action is the task you want to accomplish with that keybind. A full list of available actions can be found in the Ghostty Keybind Reference.
You can list all the available current keybinds with:
ghostty +list-keybinds
Here’s my configuration for managing windows, tabs, and splits:
# Keybindings
keybind = alt+s>r=reload_config
keybind = alt+s>x=close_surface
keybind = alt+s>n=new_window

# Tabs
keybind = alt+s>c=new_tab
keybind = alt+s>shift+l=next_tab
keybind = alt+s>shift+h=previous_tab
keybind = alt+s>comma=move_tab:-1
keybind = alt+s>period=move_tab:1
keybind = alt+s>1=goto_tab:1
keybind = alt+s>2=goto_tab:2
keybind = alt+s>3=goto_tab:3

# Splits
keybind = alt+s>ctrl+v=new_split:right
keybind = alt+s>ctrl+h=new_split:down
keybind = alt+s>z=toggle_split_zoom
The keybindings are self-explanatory and easily configurable. What’s missing for now is the ability to run custom scripts via keybindings. For example, in Tmux, I use:
bind-key -r f run-shell "tmux neww ~/.local/bin/tmux-sessionizer"
I hope this feature is added in the future so I can fully transition from my Tmux workflow!
Final Thoughts#
Ghostty delivers on its promises: it’s fast, native, and highly configurable. The keybinding system alone makes it worth trying.
The main gaps are background image support and custom script execution via keybinds. If those get added, I’ll probably ditch Tmux entirely.
If you’re shopping for a new terminal, give Ghostty a shot. It might stick.